
How To Mend Your Jeans Using Sashiko Stitching
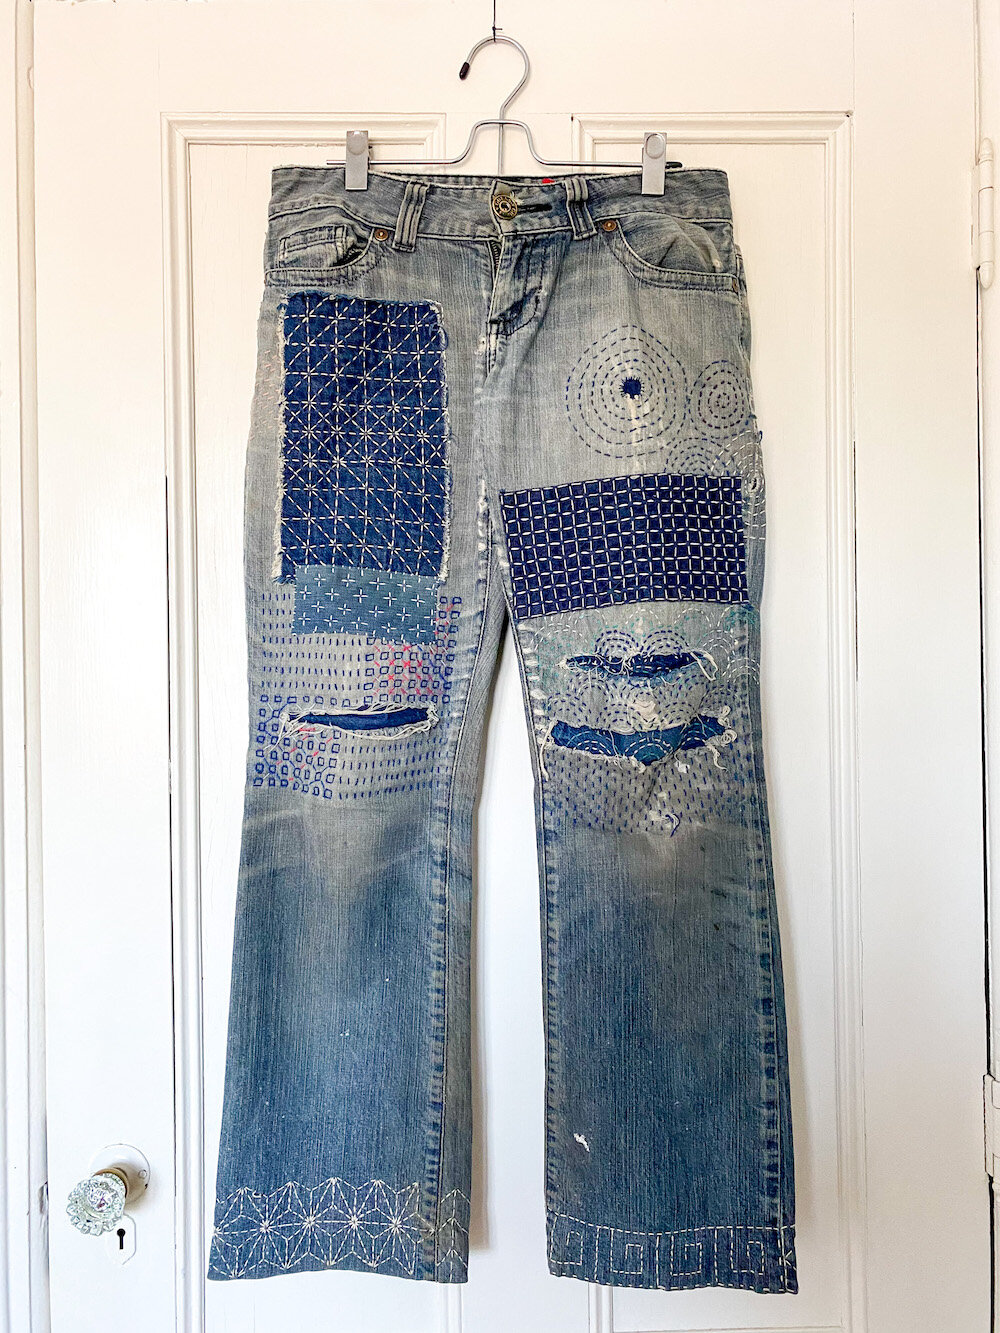
I have a favourite pair of jeans that began their life with me when I purchased them from a second hand clothing store seven years ago in 2014. They were bought as a spare pair of jeans because I forgot to pack some for my holidays. Upon returning home, they soon turned into my studio jeans. Because they were a spare pair, it didn't matter if I got them dirty.
I was studying my Masters in Art at the time, and I was spending a lot of time in my studio. Before long my favourite studio jeans started getting holes in them. I did not want to buy a new pair of jeans (whose main purpose was to get dirty) so I started patching them.
At the time I was interested in learning more about Sashiko. A friend introduced me to the delightfully complex patterns explaining that whilst they look confusing, they can be broken down into a series of simple lines.
I was hooked. My logical brain loved looking at the patterns, whilst the textile artist in me delighted in playing with fibre. My environmentalist side was happy to be doing my bit to help lessen my environmental impact.
Environmental impact
Sadly, the textile industry is one of the biggest polluters in the world. When I started looking into it, I discovered China’s jean capital of the world, Xingtang, creates over ⅓ of the world's jeans. I was saddened to learn (and see) untreated chemical dye waste being released into river systems. Ph levels in the waters around Xintang go as high as 11.9-12.1 which renders life for fish and other species impossible, and causes skin, eye and mucous irritation to humans.
Xingtang is covered in a blue dust from the treatment of the fibres to make the jeans look worn. This is achieved by running a sander over the garment to distress the fibres. The down side of this is that many of the residents of the city suffer from lung and respiratory disorders from the airborne pollutants.
This news was so sad I was wondering how I, as one person, could help lessen my environmental impact, and the numbers became astonishingly clear. That's why I now share with others how to mend our jeans.
For each pair of jeans mended we save:
10,000 lt water (so much is used in the growing of cotton, the dyeing and processing of the material)
3 kg chemicals
Jeans weigh on average, about 700gm per pair, so saving almost 1kg from landfill
20kg of CO2 emissions
Studies have shown that by extending the life of your clothes by nine extra months translates to a reduction of your carbon and water footprint of 25-30%!
So, Whilst you may not feel like repairing your jeans is doing much - you are in fact making a great contribution to saving our environment - one stitch at a time.
Sashiko
Sashiko, when translated means 'little stabs' which refers to the action the needle makes whilst mending your jeans. Sashiko is pronounced sash-co. The ‘i’ is soft and almost silent.
This tutorial can be used to repair any textile item with a tear in it. Quite different to Western embroidery, sashiko uses a longer needle to load multiple stitches onto it before sewing through.
1 - https://www.fashionrevolution.org/wp-content/uploads/2017/02/What-My-Jeans-Say-About-the-Garment-Industry.pdf
If you would like to know more about the history of sashiko, I have another article on it here on my website >>
Materials:
Needle
Thread
Scissors
Patch of fabric the same weight as the material you are mending
Safety pins
Fabric marker (I like to use Frixion pens)
Ruler
Getting started
For the best results I would recommend working with a specific sashiko needle and thread (they are designed specifically for mending textiles) but, if you don't have these you can use a regular needle and thread.
Step 1
Ensure the fabric patch is larger than the area of the hole. The fabric will be well worn in this area and likely to continue to fray. A larger patch will prevent more patching in the near future. Fold over edges of patch and iron.

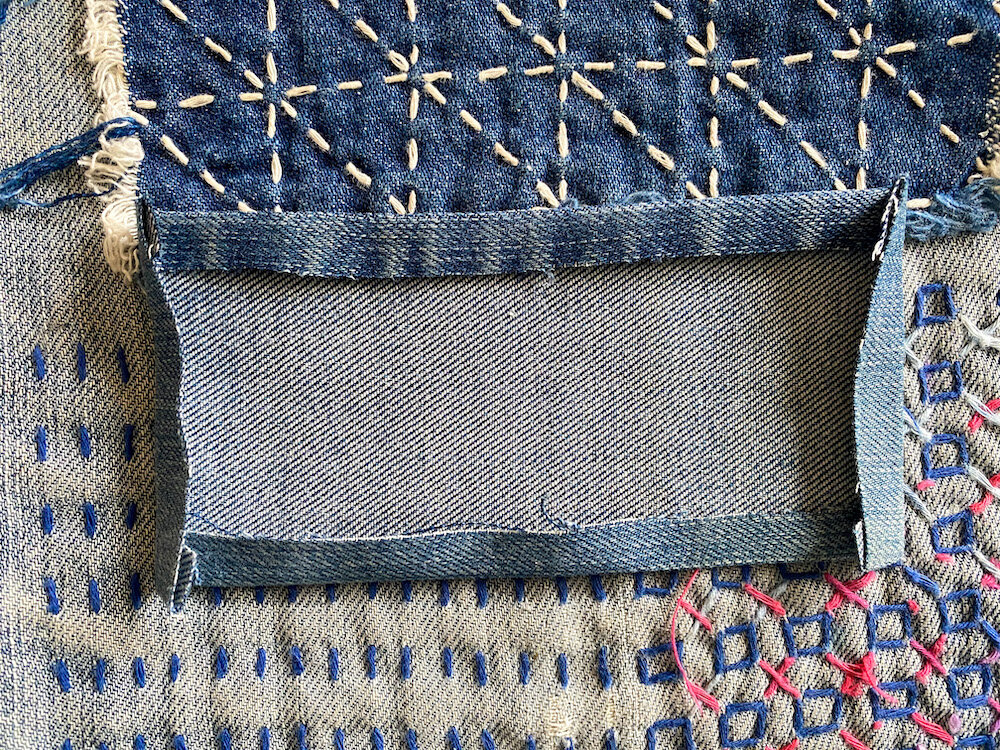
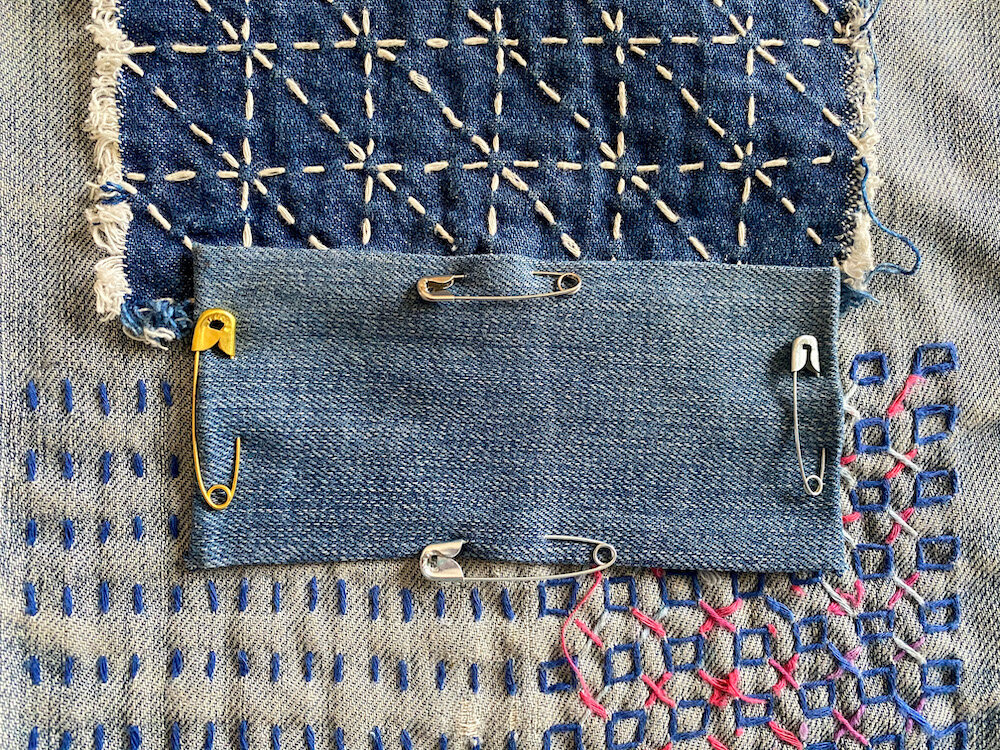
Step 2
Place the fabric patch over the hole and pin in place using safety pins. I like safety pins because they will not fall out, or inadvertently stab you whilst you are mending.

Step 4
Using a ruler and a fabric marker, measure out a 1/2 inch grid over the area you wish to stitch (in my case the entire area of the patch). I prefer to use imperial measurements which allows for a little extra space between stitches, compared with metric.


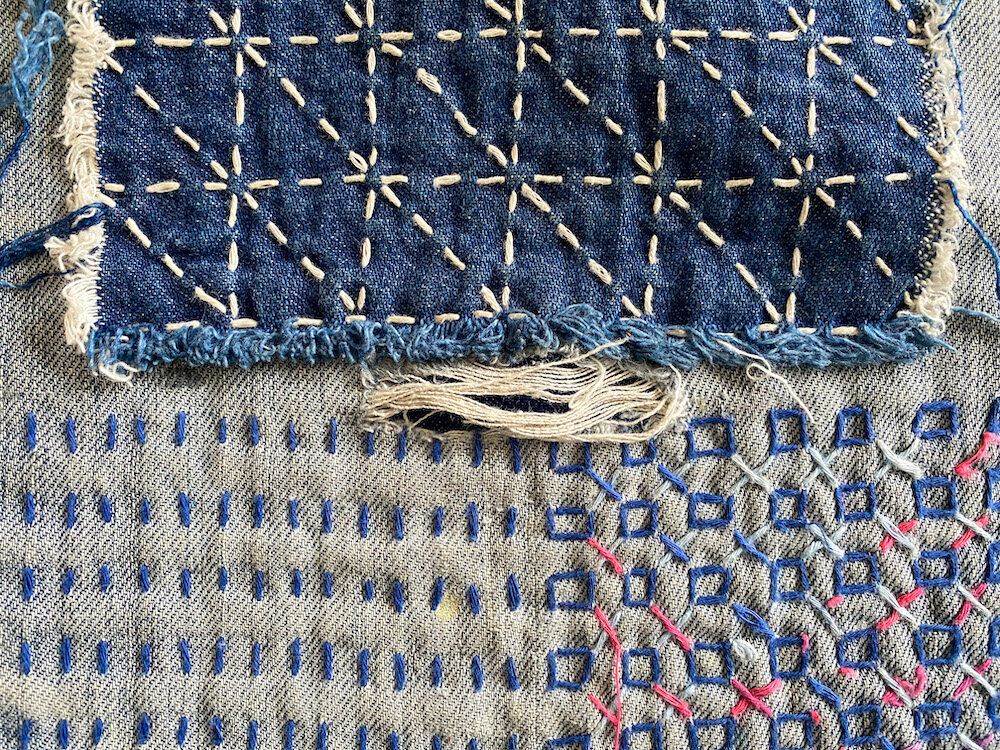
Step 5
Using the grid as a guide, and referring to the stitch pattern stitch 1/2 inch stitches along the vertical length of the patch, leaving a small space where the grid lines meet

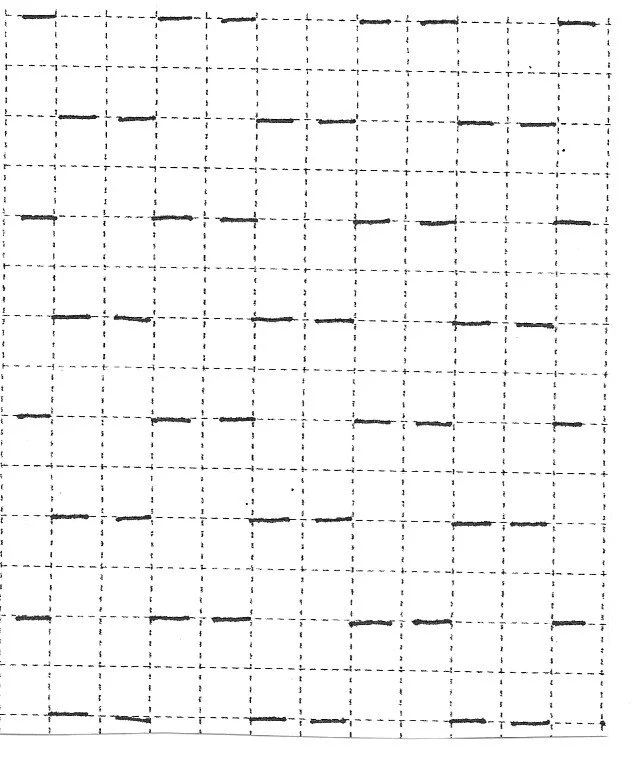
Step 6
Continuing to use the grid as a guide, stitch ½ inch stitches along the horizontal access of the patch, leaving a small space where the grid lines meet.
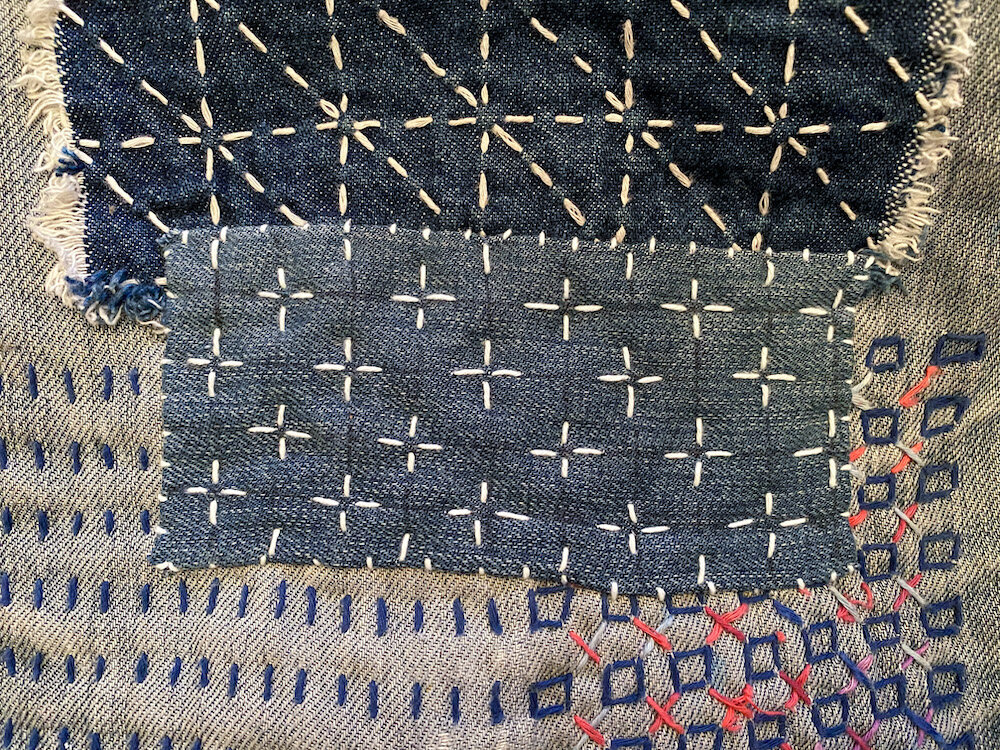

Your stitches will now form a star-like pattern. And you now have a very beautifully mended pair of jeans that you can wear with pride! To finish everything off, give the stitching an iron to magically remove your Frixion marks and you are all set.
Written By:
Kate Ward
Kate is an artist and educator and the creator of Zen Stitching (www.zenstitching.ca) where she shares her love of mending.